Block 'Plugging' ...
(entry by John Amoss)
The following is a summary of how I used a plug to rectify a mistake while carving the keyblock for my entry in the 1999 [Baren] Exchange.
During the few last clearing cuts of this keyblock, my U-shaped chisel broke though the narrow wall of wood intended to be the cat's shoulder. The carving was thin and the ridge of wood lay at a 90-degree angle from the grain making that segment very weak.
Sometimes such events can be happy accidents, leading to an unexpected character or form. This was not one of those times and I knew that my slip of the chisel had to be fixed. I considered a couple of alternatives: trying to stick the piece back with a water-proof glue, or using a wooden plug. Since the line was thin and susceptible to breaking again, I chose the latter as the cure.
The first step was to decide what area needed replacing. Even though the chipped part was only 1/2" wide, I chose to make my plug a full square inch for added strength. I rummaged through scraps left over from cutting the same basswood planks (a good reason to leave a few pieces lying around) and located a 1"x 3" piece. I then hand-planed it to a thickness of about 1/2", and cut it down to the rough 1"x 1" size, while taking care to match the grain direction of the main block. I wasn't too concerned if the angles of the plug weren't perfectly square, in fact I deliberately made one side a little off so that the piece would only fit in only one way. The edges of the plug were sanded to form a very slight taper- making the top of the plug ever so slightly larger than the bottom.
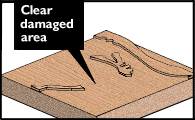 To prepare the intended
hole area, I first very gently cleared the design so that the plug
could lie flat on the block. It was then positioned and its outline
was scribed onto the keyblock using a sharp
pencil.
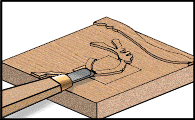
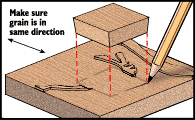 To carve the hole, I began
cutting right on the pencil line using small straight chisels and
clearing with the bull-nosed chisels (aisuki) as I
went.
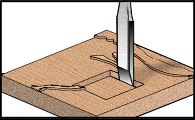 While attempting to fit the plug into the hole,
I took care not to dent the surrounding printing area by forcing the
piece in. Eventually, the plug slid in and I could then judge the
appropriate depth needed to be cleared. I continued this excavation,
each time gingerly fitting the plug in until it rose just a hair
above the surrounding wood.
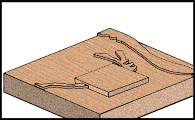 I then
added a dab of waterproof glue to the base of the plug for good
measure. When all was ready I carved it to match the 'pre-mishap'
design and then took an aisuki and very lightly shaved off the top
of the ridge to conform to the surrounding keyblock's printing
surface.
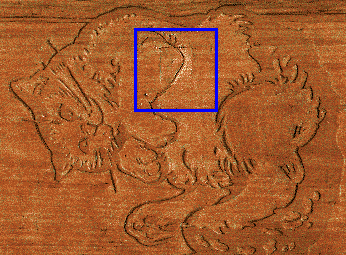
 Even with the care I took
through all of this, a noticeable line between the block and the plug
remained. But since wood expands widthwise when wet, at printing time
I happily noticed that the plug and the surrounding block expanded to
form a tight seal.
It was a joy to find out that sometimes this craft can be forgiving to the inexperienced!
This page copyright 1999 John Amoss