Today's postings
- [Baren 42189] moku hanga technical problem (Linda Beeman)
- [Baren 42190] Photographing your work (Elizabeth Nielsen)
- [Baren 42191] RE: Photographing your work ("Maria Arango Diener")
- [Baren 42192] Re: Photographing your work (Arthur Bacon)
- [Baren 42193] Baren Member blogs: Update Notification (Blog Manager)

Message 1
From: Linda Beeman
Date: Sat, 23 Oct 2010 13:13:45 GMT
Subject: [Baren 42189] moku hanga technical problem
Send Message: To this poster
I think this is it. I noticed on the previous block after it dried that there was what looked like mica on the block. It looked almost sparkly. I could wipe it off like dust. I thought, again, maybe it was from the pigment.
It is Kihada from the Mall. I've never had a problem with it and it's wonderful to print on.
Linda
>If a batch of paper was sized with too much alum in the mix, that
paper will be very resistant to the entry of pigment. If there is a
kind of faint 'shine' on the surface when you hold a sheet up to the
light (before moistening) - as though there were a faint layer of mica
on the surface - it's a sign of too much alum ...
What kind of paper is this?
Dave

Message 2
From: Elizabeth Nielsen
Date: Sat, 23 Oct 2010 15:00:47 GMT
Subject: [Baren 42190] Photographing your work
Send Message: To this poster
I'm writing to ask for advice on photographing my pieces. Since graduation
I haven't had access to a copy stand, and I'd love any tips on obtaining
good images of my prints. (There's little as frustrating as having a
beautiful piece and a bunch of photos that don't do it justice.)
Thanks!
-liz-

Message 3
From: "Maria Arango Diener"
Date: Sat, 23 Oct 2010 18:37:20 GMT
Subject: [Baren 42191] RE: Photographing your work
Send Message: To this poster
I've had good luck with this approach although now I use a digital camera so
the "film" references are kaput. The main things are proper lighting and
proper focusing. As photogs like to say, your photos must be "tack sharp".
With digital cameras, the secret is to take about a dozen shots of each
piece. A tripod is about indispensable. Anyhow, here are a few tips:
1. Whether 2-D or 3-D the work must be well lit. 3-D work is best
photographed in controlled indoor settings where lighting can be manipulated
to obtain the most dramatic effect from light and shadow. 2-D work, however,
has the advantage that it can be more easily photographed outside on a good
sunny day. In either case, obviously the film chosen has to match the
setting so be sure to consult a good source and get indoor film for indoor
shots and outdoor film for outdoor shots.
I use the convenience of outdoor lighting with added advantage of the ease
of availability of outdoor film for all weather conditions. My preferred
background is a sheet of mat board, either black or off-white, which I clip
with bull dog clips to a 4' x 4' piece of wood I keep handy for this and
many other purposes. I then clip the artwork to the mat with the same clips.
If it is windy outside, I use artist's removable tape on the back of my
works to steady the prints and remove the clips from the shot. All my work
is on paper or wood.
Lining up the camera to the (2-D) work probably makes the most difference in
how professional the slides or photographs look to a judge. The trick is to
have the work and the camera tilt at the same exact angle or be perfectly
straight with the world. Otherwise, the sides of the work will converge and
give you away as an amateur photographer. The easiest way to accomplish this
feat is with a multiple adjustment tripod. It takes a while to get that
first adjustment right, but once accomplished all the work will be lined up
correctly. Letting the work fill the entire view finder works well to
correct any angle discrepancies, but then your work will be slightly
distorted. It is best to spend some time setting up the tripod and work so
that the sides of the work correspond with the square of the view finder.
2. Once work and camera are lined up, get out the gray card (18% gray)
and read the proper exposure. I do a lot of high contrast work and it is
almost impossible to get exposure right without the use of a gray card,
available at your photo supply shop. Even after setting the correct
exposure, it is a good idea to "bracket" several shots, shooting some at the
correct exposure, some at the next aperture and some at the previous
aperture. Be sure to set the camera for the right film speed and set the
shutter speed to a high setting to flatten 2-D work and avoid blurring. 3-D
work should be shot at a slower speed to allow for more depth of field. Any
time where detail is crucial, a slower shutter speed can also be used. If
all this is complete Greek to you, get help or read through the basics of
photography in your camera's manual. Although some of the more modern
auto-everything cameras do a fine job at getting good slides or photos from
your work, once you see more professionally taken slides you will appreciate
the art of photographing art.
Focusing may seem like a step that you would not forget, but I have seen
other artist's slides and could not believe how a little bit out of focus
can make a great piece of art seem.not so great. This is especially
important for 3-D work, where the depth of the object has to be in focus.
Put your trust in your camera's cross hair system and even take the time to
measure the distance between camera and art to obtain the best possible
results.
3. Time to click click click, and I mean that literally. Don't just
take one slide that you think is going to be perfect. Take a dozen or so of
each piece of work, hopefully you saved up three or four works to all be
shot at once so that you can "fill" a roll or two of film. Two items made my
life much easier at this point; one is an inexpensive cable release for
pressing the shutter release remotely so that you don't disturb the camera's
positioning. The second is an auto-advance motor, again to prevent
disturbing the camera as you advance from frame to frame. Even so, check the
positioning of the camera to the work every three shots or so because
gremlins crawl in your tripod from time to time and disturb the entire
alignment.
[=o=][=o=][=o=][=o=]
www.1000woodcuts.com
www.artfestivalguide.info
[=o=][=o=][=o=][=o=]

Message 4
From: Arthur Bacon
Date: Sun, 24 Oct 2010 03:06:58 GMT
Subject: [Baren 42192] Re: Photographing your work
Send Message: To this poster
Needless to say, good equipment helps enormously and if you are young the
expense of such equipment might seem daunting, but, I would aver, in the
long run it will pay for itself. I assume you mean photographing in digital.
I have a modestly expensive Nikon (D200) and it works fine just shooting in
"program" mode with auto-focus. Very few problems with color balance etc. My
girlfriend has a small Nikon P&S and it does not work so well; the point
being that yes, you do get better results with top-of-the-line equipment. I
guess it has much to do with the "sensors" about which I understand
practically nothing. Well, sensors, white balance and saw files. I assume
you are adept at Photoshop.
However, to make the best use of a smaller camera, certainly use a tripod. I
always use a tripod regardless for several reasons, the most important being
steadiness. There is NO comparison between hand-holding and using a tripod;
don't even consider hand-holding for a nano second.
Secondly, the lighting is enormously important. I think the Kelvin
temperature is 5,000 for daylight. Digital photography uses white balance to
adjust. Again, these are things I am not fully knowledgeable about but aware
of. Sometimes we photograph my girlfriend's paintings in her studio using
natural light. Other times we use "daylight bulbs" measured out from the
work at 45 degrees (or any angle but always the same distance) and I aim the
lights so they cross (as I am facing the work, I aim the light to my right
across to the left side of the painting and vice versa) I also have a pretty
good spot meter with which I measure the light with a grey card (or any
other card) at various places on the painting. By the way, I am doing all of
this against a wall.
Thirdly, the tripod allows you to square up the image. Begin with
"eyeballing" the lens in relation to the work. Make sure it is at the same
height as the center of the work and directly in line with the (center of)
work. All of this is to avoid parallax error; I mean, you want all the edges
to be square, or as square as possible (some correction is possible in
Photoshop but...) So, once you are pretty square, fine tune it so all four
edges of the picture frame are square with the work.
In re-reading your letter I realize that you have small work which you want
to photograph a la table top. Hmmmm...I use an old (photo) enlarger stand on
which i put my camera. I use two ordinary side table lights off to the side
with daylight bulbs with crudely attached aluminum foil attached to reflect
the light toward the art work. I have used very sophisticated stuff (Leica
cameras and high tech lights and bulbs) but my Rube Goldberg set-up equals
the other stuff for duplicating my photographs. Again, solidity (stability)
is paramount; and then the light must be balanced properly. If you are going
to be doing a lot of this sort of thing, I would recommend getting hold of
an old enlarger stand like mine...not much help since I cannot tell you what
brand mine is....but if you live in a big city the guys at the local big
camera store might be of some help (but as likely not, since they are
usually so full of themselves and so insecure)....the thing is, you need
something which holds the camera steady and moves straight up and down. I
realize I am digging myself into a dark hole of obfuscation so I will shut
up.
*The main thing to know is that photographing art work is not easy*. There
is a lot of information out there on that thing Al Gore invented (the
Internet) and I am sure you have probably gotten a plethora of very good
suggestions from other Baren members.
Bon chance, Arthur
Digest Appendix
Postings made on [Baren] members' blogs
over the past 24 hours ...
Subject: Almost There...
Posted by: Ellen Shipley
|
We set up the display panels and the pop-up in Tina & Tony's backyard. Here's the pile-o-art all bagged up and ready to go into the van. Like my vicious guard dogs? ;-j Now off to bed and up with the birdies. |
This item is taken from the blog Pressing-Issues.
'Reply' to Baren about this item.
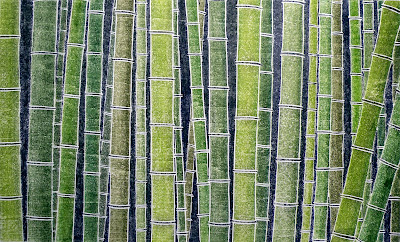
Subject: Bamboo Forest (white line woodcut)
Posted by: Viza Arlington
This item is taken from the blog VIZArt.
'Reply' to Baren about this item.
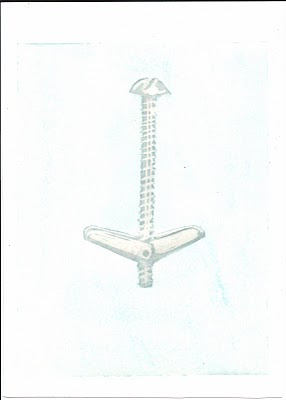
Subject: Toggle emerging
Posted by: Andrew Stone
This item is taken from the blog Lacrime di Rospo.
'Reply' to Baren about this item.


