Carving Techniques for Creating Texture (entry by James Mundie)
Woodcut techniques:
Although I am devoted to etching and mezzotint, woodcut has always been my first love. These past few years I have not had access to a printing press, so I have been concentrating on woodcut exclusively. Woodcut requires very little equipment and space, but the medium offers endless possibilities for experimentation.
 In the present series of woodcuts, I have been challenging
myself to achieve the sort of even tonal effects one gets more easily
in etching, painting or drawing. I have gained some marked success
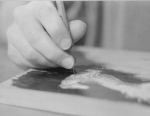
through a combination of close and intricate cutting, stippling with
a needle, and brushing the surface of the board to reveal its grain.
I find that wood is ideally suited to the portraits I've been
producing; the texture of wood is similar to that of human
skin.
In the present series of woodcuts, I have been challenging
myself to achieve the sort of even tonal effects one gets more easily
in etching, painting or drawing. I have gained some marked success
through a combination of close and intricate cutting, stippling with
a needle, and brushing the surface of the board to reveal its grain.
I find that wood is ideally suited to the portraits I've been
producing; the texture of wood is similar to that of human
skin.
At one time, I fought against the character of the wood. My work was decidedly more linear then, and I found the wood's texture, scratches, knot holes, etc. to be most annoying. Through sheer stubbornness I persevered and in time came to appreciate the unique qualities of every board, and began to accept and look forward to its contribution to my prints. I've become a firm believer that a woodcut should and must impart something of the wood from which it came. I don't go so far as to "ask the wood what it wants to be," as a former instructor suggested, but I do allow the wood to make some of my decisions as to the final appearance of the print. I merely accept what the board will give me and let it happen. That element of the unexpected nicely modifies my otherwise controlled cutting.
The techniques that I explain and introduce below are intended for use in the woodcut medium, by which I mean printing in oil-based ink. It is possible that some of these techniques might translate into Japanese-style woodblock printing, but I have some reservations, which I will note below as they arise in the text.
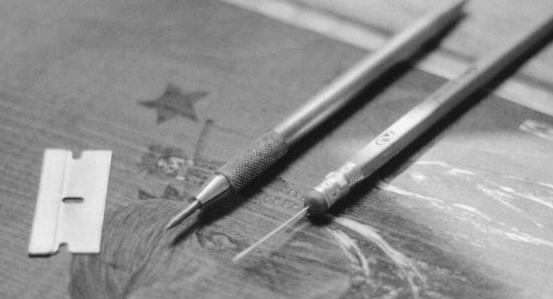
In my woodcuts, I am working primarily on planks of white or clear pine with a razor blade and needles to get my desired effects, exposing the natural grain of the board to modulate shadows and create abstract background textures.
Preparing the Board for Cutting
I buy pine boards of the type sold for furniture (l inch x 8 inches or 12 inches wide) from various lumber suppliers. Most of the boards are smoothly planed when I buy them and require no additional sanding. I generally allow the boards to dry and season in my studio for at least six months before I cut on them. This ensures minimal warping and splitting during the carving and printing process.
When I'm ready to begin, I generally sketch my design directly onto the board with a soft pencil, and then firm it up with a permanent pen. At this point, I generally know that I will later manipulate this or that area for texture. Having the drawing set, I then proceed to clear any large non-printing areas with a U-gouge--being careful not to disturb areas of the drawing which will be carefully cut with the razor.

Razor Blade(s)
All of my woodcuts are carved with a razor blade - the single-edge industrial type one uses in paint scrapers. The razor blade is the cheapest and most versatile cutting tool one could ever hope for. All one need do is walk into any hardware store and buy a box of one hundred blades. One need never use or sharpen a dull knife again; discard the dull razor and pick up a new one. This is a point I cannot stress enough. In the past, I have recommended razors to fellow woodcutters for tricky carving areas only to find that they abandoned the razor because, "It worked fine at first, but ..." He had been mangling the board with the same blade for three weeks. He may as well have tried cutting with his shoe! When I cut, I average a new blade every fifteen minutes, so treat yourself. Few things are as satisfying as a fresh, sharp blade.
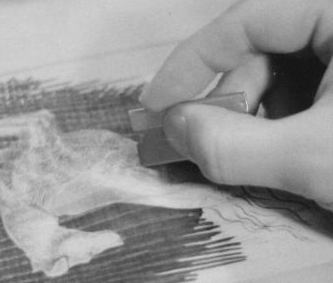
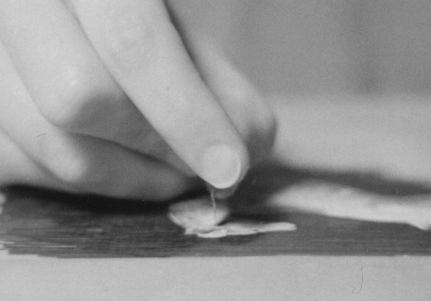
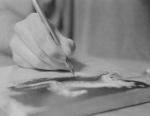
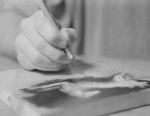
Aside from its extraordinary sharpness ("sharp" and "razor" being nearly synonymous), the razor blade is extremely flexible and well suited to cutting through the wood's grain. One need only exercise some caution (see photograph for the proper way to hold the blade) and apply the appropriate amount of pressure. The blade also allows for a certain amount of forgiveness. Unlike a V-gouge, the blade can make a single "invisible" cut that will not print if left alone. Therefore, a misplaced cut need not appear in the final print.
My first cut along a line is directed down and at a slight angle away from the line. The next cut will be parallel to the first but directed in at an angle to meet that cut so that the blade clears a sliver of wood. Ideally, that first cut should extend along the entire length of the desired line in one fluid motion. When cutting around small round forms, I generally make several straight cuts around the form and then trim off the corners to the desired shape.