My Registration Method (entry by E.B. Atwood)
My printing table was created from a standard tilt-top drafting table. It is spacious and movable for placement at any angle to the counter that holds my 42" glass palette. There is space for any required printing tools - and a stack of paper ready for working an edition.
This system is for printing on dry paper.
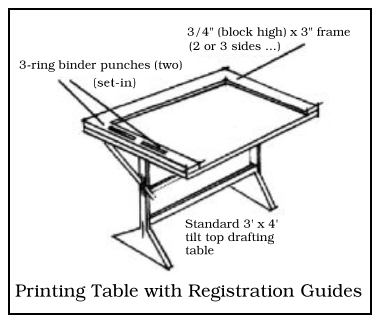
The 3" bordering frame was originally intended to hold the pins used for registration along with forming the corner to align the woodblock.
After many years of struggling with traditional methods of registration with varied success, I decided there must be a better way. My partner volunteered to inlay two common 3-ring-binder punches in the bordering frame to be used for registration guides.
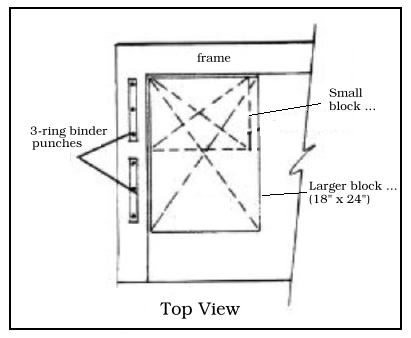
The punches are set back far enough from the inside edge of the frame to allow an unmarked white border for the print. One punch works well for smaller blocks - but with two, there is a better grip on the paper used for my larger prints from an 18"x24" block.
I work with oil-based inks printing on dry paper (preferably "hosho" and with "tableau" for proofing.) When working wet-on-wet (ink not paper) and exchanging the blocks, the punch holds the folded back sheet in a positive grip with its top plate not allowing any strain on the paper peg holes. For making a reduction print, replacing the paper on the punch pegs before each additional color can be done neatly and without mishap.

For a special edition with pre-torn paper, I placed an "ell" in the alignment corner and calculated the extra length to allow for the lower punch area.

The table is adaptable for anyone working in a necessarily small area because it is large enough to accommodate one's palette. Also, it can be tilted down and moved out of the way where space is at a premium. The 3-ring-binder punches are available at most supermarkets - very inexpensively. This is definitely a non-traditional but Western approach to printmaking.