Basics of Gradation Printing ('Bokashi') (entry by David Bull)
It should perhaps go without saying that before you try and tackle gradation printing, you should be feeling comfortable with your ability to make a 'normal' smooth impression. But I don't suppose that's the advice you wanted to see when you chose this page to read! So let's get with it ...
The normal printing process uses wet pigment and paste, placed on the wood separately, and then mixed together well by the brush and spread across the entire surface of the printing area. Gradation printing also involves leaving a mixture covering the entire block, but with one major difference - the pigment is confined to just one area. Nothing but water or paste is on the rest.
This is achieved by limiting the motion of the brush in such a way that pigment generally stays where it was put. I say 'generally' because some of the colour inevitably migrates out from that area ... and it is this migration that produces the gradation.
Two tools are used to apply the paste/colour/water to the block: the brush, and the 'tampo' (rag). This tampo is nothing more than a small flat block of wood with a rag wrapped around it (held in place with pins, a rubber band, or a spring clip). The rag is well moistened before work begins, and is wetted again as needed as the printing progresses. The size of this block of wood will depend on the particular design being printed, but a typical one is about the size of a playing card, and not quite an inch thick.
Let's use the example of the famous dark band in the sky that appears in many of the famous Ukiyo-e prints ...
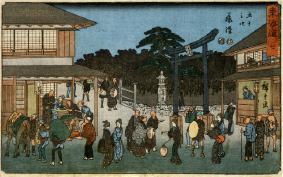
In this print, the basic blue of the sky is printed first, extending right to the top margin of the print. The gradation then follows - using the same block.
Step one: use the rag to moisten the entire area of the sky. Bang the wet tampo down at one end of the area, and slide it across to the other end. There should not be any loose water left standing on the surface, but the wood should be thoroughly moistened. Move along quickly, before this moisture either dries out, or soaks in ...
Step two: choose a brush with a width that will allow it to cover the entire area in which you wish colour to appear. Hold the brush face up for a moment, and apply paste to one end, and pigment to the other.
Step three: start rubbing the brush on the block - but unlike the normal pattern of rubbing in various circles and swirls - rub only in a side to side motion along the line of the top of the sky. In this case the end of the brush containing the paste will be 'lower' in the sky, and that containing the pigment will be at the top. As you brush back and forth you will see the pigment being drawn into a gradation with the paste, just as the paste will be drawn into an invisible gradation with the moisture on the block. There should be an unbroken smooth transition between pigment ... paste ... and moisture.
Step four: when it seems to be ready, print the impression in the usual way, rubbing the baren across the entire area of the sky, not just on the portion containing pigment.
Repeat on the next sheet - remembering which end of the brush is which! One end for pigment - one for paste. Do not allow the brush to become turned around, or you'll just get a mess ... Make a mark on one end of the brush if you wish, to help you remember.
Notes:
- The size of brush you choose, the amount of pigment, the amount of paste, how wet the block is, how far down the block you brush the mixture, the amount that your brushing motion deviates from the horizontal ... all these things allow you to control the appearance of the resulting gradation. It can be as broad or narrow as you like.
- For a wide gradual 'full-sky' gradation, don't try and get the effect in one pass. Do it two, three, or even four times, extending the area of operation each time. (Don't do these right after each other on one sheet of paper. Do the entire stack with the first pass, then move on to the second, etc. The paper will pick up much too much moisture all at once if they are done consecutively.)
- Just as you do with the brush, keep the rag turned the same way each time, as it inevitably starts to pick up pigment. You will have to re-wrap the cloth around the block occasionally, in order to bring a clean surface to bear.
- A square ceramic tile makes a great place to put the rag between applications - easy to keep clear and clean. Placing the rag on the workbench inevitably picks up bits of dust or dirt, which are then transferred to the woodblock ...
- Water, water, water ... Just how much should be on the block? You'll simply have to experiment with this. Too much will give a watery blotched appearance - too little will cause the pigment to appear in sharp streaks, rather than a smooth blend.
There are many 'sub-categories' of gradation, and I'll save them for another page later ...