The making of a 'white-line' print
(entry by Jeanne Norman Chase)
Editor's note: Details are difficult to see in these small images. Clicking on any one of them will pop up a larger view ...
White-line woodblock printmaking began in 1915, the first woodblock printmaking unique to the United States. Western artists admired the Eastern traditional type of woodblock printing made by the Japanese artists. The Eastern art form required several blocks of wood to produce a finished print. The Western printmakers of 1915 created their own style of woodblock printing using only one block of wood.
The method started with a group of six artists in Provincetown, Massachusetts and this new form of woodblock printmaking became known as the Provincetown print, or white-line woodcut. Their work has been exhibited world wide, and recently at the National Gallery of Art in Washington DC.
The style of the original printmakers was to use simple shapes, as each section had to be separately brushed with watercolor, and any large shapes would thus dry too quickly. The style was also naive in feeling - not too realistic, capturing people in everyday life ... hanging clothes, at the beach under colorful umbrellas, gathering at a tea party. Many colors and patterns were a trademark of the style. The print that I will demonstrate here uses the technique of the Provincetown printmakers but is not particularly naive in feeling.
As only one print at a time was able to be produced, it sometimes took months to finish an edition. Some of the artists would work on four or five at the same time - this way when one color was mixed, it could be applied to the blocks of many different prints. Editions varied as the artists would sometimes have a knife close at hand and cut into a pattern after some prints had been pulled. By the time perhaps 25 copies were printed, the colors had changed and patterns were added to as the print progressed, even though the basic image remained the same. So each print was unique.
Materials and Tools
These printmakers used soft pine wood about 3 inches thick. Any thinner and the blocks have a tendency to warp. (I am doing this demonstration on a board of poplar instead of pine.)
While the Japanese woodcuts are made with sophisticated knives and chisels these printmakers used simple tools - a craft knife for cutting, watercolors, a watercolor brush, and a silver spoon. The spoon enabled the printer to get into the small areas to print. Silver was used as a regular spoon could leave dark marks when rubbing.
The only material in common with the Oriental woodcut method would be the paper, which would be a fine quality Japanese paper, if possible.
Process
The registration was uniquely different since only one print at a time would be printed. The side of the paper was tacked to the board and folded back, in the same way that a book would open. This would keep the registration lined up at all times and the print could be left while other prints were inked. The margin could be any size that one wanted. In this demonstration, I am leaving a small margin. It can be done on one large block or, as I show here, with the addition of an extra strip for the margin.
The paper is attached to the left edge of the block with thumbtacks, then gently folded back. This makes the register. The paper is repeatedly lifted and printed so this method keeps the paper in constant register.
The lines are cut into the block with a V-shaped cut of the knife. The lines remain white in the finished print, as only the raised areas which are left receive any colour. It is a relief print in reverse.
To print a color, mix it alone on a palette. You do not have to mix too much as it will be applied to only one print (or more if you are doing more than one image at a time). I am only doing the one print so I need very little color. You use a small watercolor brush as the area should be small or they will dry. Apply the paint to the area (or areas) that you intend to print. Fold the paper down on top of the block and rub very gently over the inked area with the silver spoon.
Step one

The image was drawn on tracing paper then turned over and retraced with a litho pencil. The original side was laid down on the block and drawn on the wood, thus the drawing was not in reverse. The cat was added as it offset all of the horizontal lines, making a better composition.
Step two
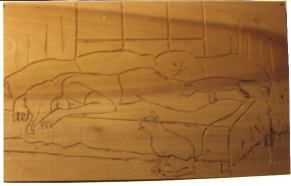
All the lines were cut in with a craft knife, making V-lines that would appear as white lines. I used an X-acto knife, changing blades often.
Step three
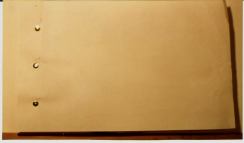
The paper to be printed upon was tacked to the edge, as you would open a book.
Step four
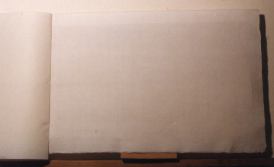
A protective sheet was tacked on top of the sheet to be printed .You can also see the line of the paper as it was sharply, but gently folded back. This was necessary to the Provincetown Printmakers as they usually were working on more than one print, sometimes as many as six or more.
Step five
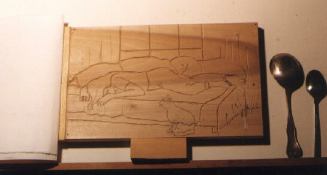
The paper is folded back and the block is ready to receive the watercolor. The little wooden block below the carved block is there because I work at my (tilted) drafting table and not at a flat table.
Step Six
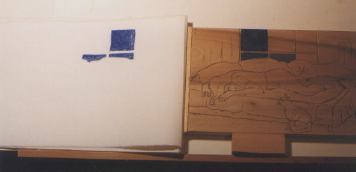
The colors are applied slowly and let dried one at a time. This process takes a long time that is why the Provincetown printmakers usually worked on more than two or three prints at a time.
You can see what happens as the colors are applied in sequence ...
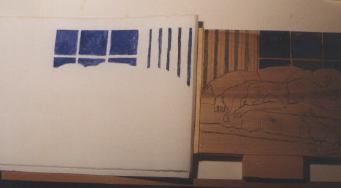
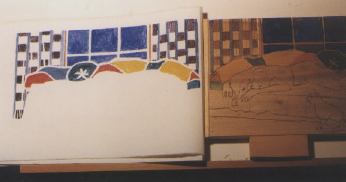
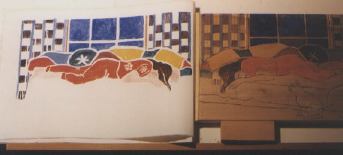
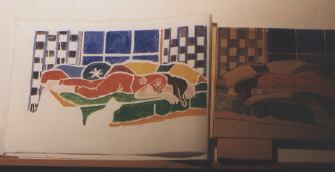
I have changed the woodblock and the image from time to time. I saw that only a small area should be applied at a time, so I made some of the areas smaller. This is the first of this type of technique that I have tried, so the application leaves much to be desired. I suggest that you start on a very small block to learn. I chose to ignore this very wise advice and did a larger piece.
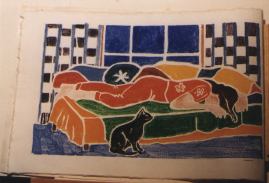
I will probably not try this again, but it was a challenge and make me appreciate what the Provincetown printmakers were and are still doing. I thought that it was interesting as it was the first type of woodcut indigenous to the United States, inspired by the Japanese style of woodblock printmaking.